
Hii,
Today I have a very interesting nail design for you. It's really beautiful and eye-catching, but it involves some work. The sunflowers weren't as easy to make as I initially thought. But with a bit of practice and a lot of patience you will be able to create the perfect sunflowers on your nails.
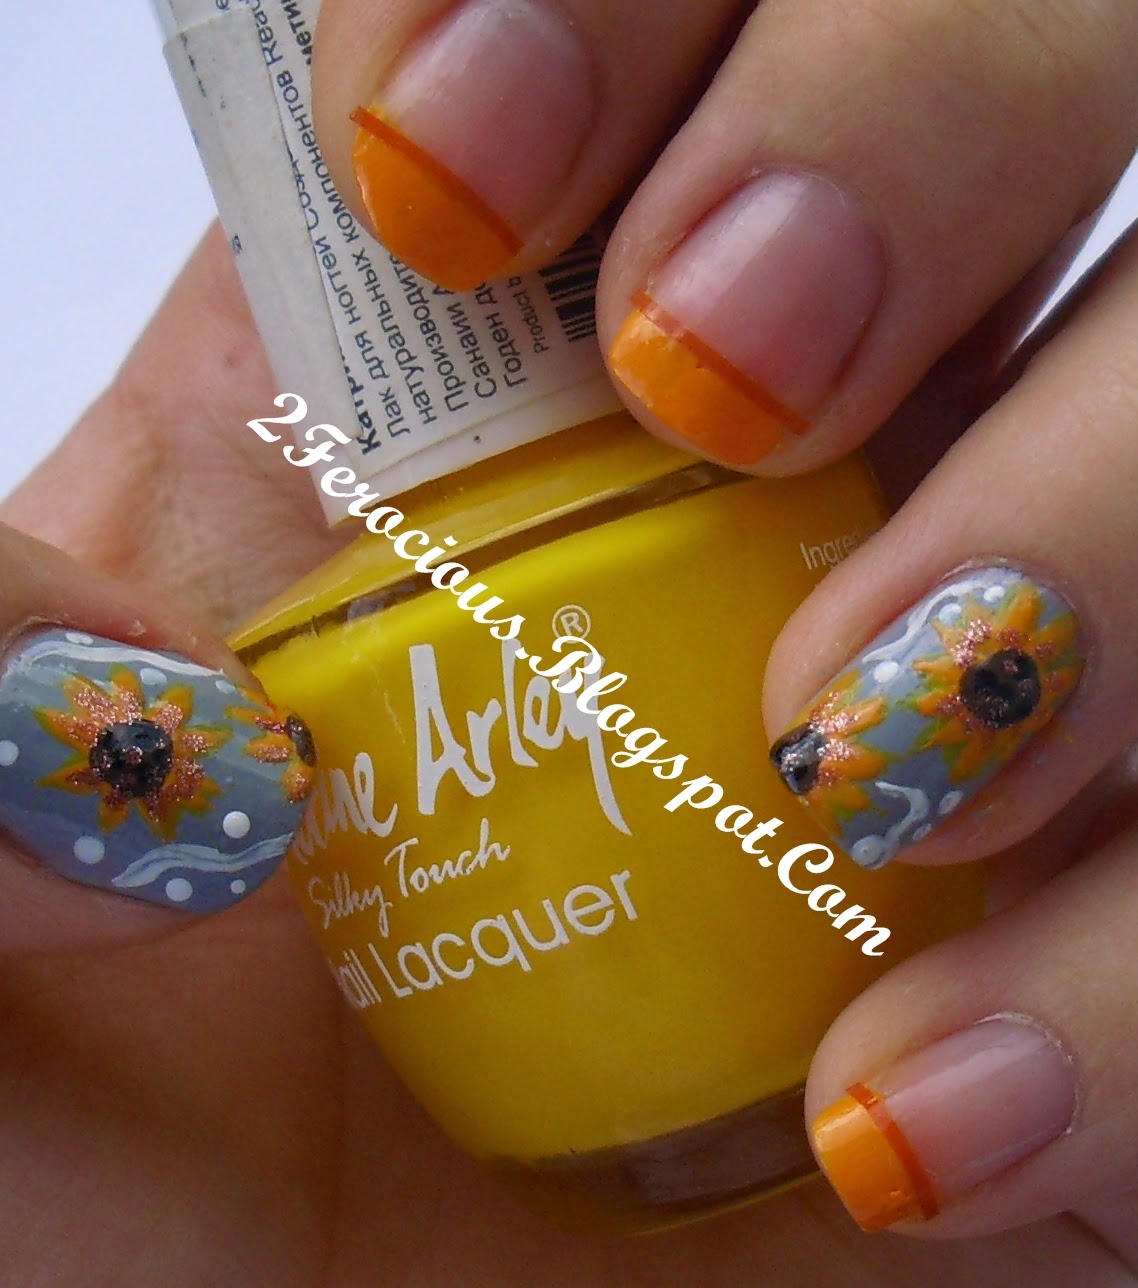
Here is the finished design. My flowers aren't "perfect", but they don't need to be as long as you are pleased with the results ^_^:
Let's get started:
I Polishes:
For this design you will basically need a grey polish for the base, a yellow and orange polish for the sunflowers, a dark brown and a black polish for the sunflower seeds and a sparkly copper polish for details. An optional polish is a white which I used to add details around the flowers. Here are the polishes I used:
- Very me Base and Top Coat by Oriflame
- Catherine Arley Nail Lacquer in 704
- Avon Nailwear Pro+ Nail Enamel in Rave
- Mania Nail Lacquer in 174
- Mina Nail Art Striper in Black
- Golden Rose Rich Color Nail Lacquer in 114
- I can't tell you the number or the brang of the grey polish since this is not it's original bottle. This is the polish I used in my "How to fix a broken nail polish" post.
II Tools
To create the sunflowers you will need an art brush and a large and small dotting tool. For the orange french tip you will need orange or red striping tape. If you don't own striping tape you can go with the orange french tip alone, but I just thought it gave the design a more finished and clean look.III Steps
- Nail 1: Sunflowers

2. Paint your nails two thin coats of a grey polish.
3. & 4. With an art brush and yellow polish make the leaves. This is the hardest part of the design and it takes some practice to get the leaves right. For reference you can look at a photo of a sunflower. It's not going to look exactly like the real thing, but we'll make it as close as possible. This is how I created my leaves: I slightly pressed down the tip of my art brush down on my nail and I swept it back. Now it's easier to do this with nail paint, but since I din't own paint and I know most people don't :D I did it with polish.
5. When the leaves dry a little go over them with your orange polish. Try to leave some of the yellow showing behind- this will give more dimention to the leaves.
6. With a large dotting tool and dark brown polish make a big dot in the center of the sunflower. You can make itas big as you like.
7. With black polish and a small dotting tool make little dots in the brown one-these will be the seeds of the sunflower.
8. With the copper glitter polish add some details and more dimention to your sunflower by adding some of the color in the inner part of the leaves and in the center of your flower.
9. With white polish make swirly lines and dots around the flowers- this way your nail will look like a picture.
When everything is dry add a top coat!
-Nail 2: Orange french tip
2. When the polish is dry cut little strips of orange striping tape and put them at the botton of the french tip.
Add a generous layer of top coat, so that the striping tape can last longer and not peel off!
You should have no trouble creating your own sunflowers. Here is another picture of the finished design:

No comments:
Post a Comment